
When you are creating content to scale, it makes sense to use a modular content model that allows for reuse. But how do you make sure that authors take a similar approach to each 'chunk' of content? That's where setting up information types can help.
In this post, I'm going to explain how to set up information types in Paligo by using topic templates.
What is information typing?
Topic-based documentation is a way of structuring content in separate ‘chunks’. So instead of having all of your content in sequence in a single file, such as a Word document, you have lots of separate pieces of information. You can then build a user guide or help system by choosing which topics to include.
What's the point in doing that? Let's take a look at the benefits.
Benefits of information typing
The main benefits of information typing are:
It makes it easier to categorise and organise modular content.
It makes it easier to reuse content. You know exactly what sort of information should be in each module.
Helps to make your content more consistent. Authors can all use the same structures, so that different types of information are separated consistently.
It makes it easier for different authors to find specific information. For example, if an author is looking to see if a concept has already been explained.
These factors mean that authors can produce content to scale more efficiently.
Information typing in Paligo
In Paligo there is no enforced information typing. There are topics and special types of topic, but there are no separate information types. Every topic has every element available. This is different to DITA, as DITA has strict types with each data type only having a sub-set of elements available. The problem with that strict approach is that it gives little flexibility, so authors can be stuck trying to make their content fit the DITA types rather than adapting the types to suit their content.
Paligo was designed specifically to provide structured content without the issues caused by strict information types.
Paligo's approach means that you can create your own information types to suit your own needs. You can do this by creating regular topics, but that increases the likelihood of different authors approaching the content differently. A better approach is to use topic templates.
Use topic templates for information typing
In Paligo, you can set up topic templates to base your 'real' topics on. For example, if you want to follow the basic DITA model of concept, task, and reference information types, you can create a topic template for each type.
Select the option button for Templates.
Select Create Content.
Select Topic and enter a name for the template, for example, Concept Topic. Note that this topic is not a 'real' topic, it is just a template that you can base 'real' topics on.
Edit the topic (I'll refer to it as the Concept Topic from now on). You'll see that the topic has a title and one blank paragraph element. These will appear in every 'real' topic that is based on this template. I tend to delete the characters in the title, but make sure you don't delete the title element - you need that for headings and it has to be there to comply with the rules of the schema. All 'regular' topics must have a title element and a para element.
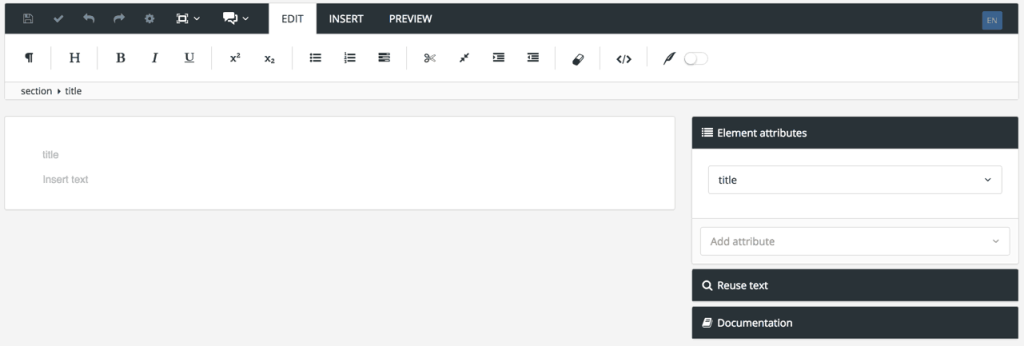
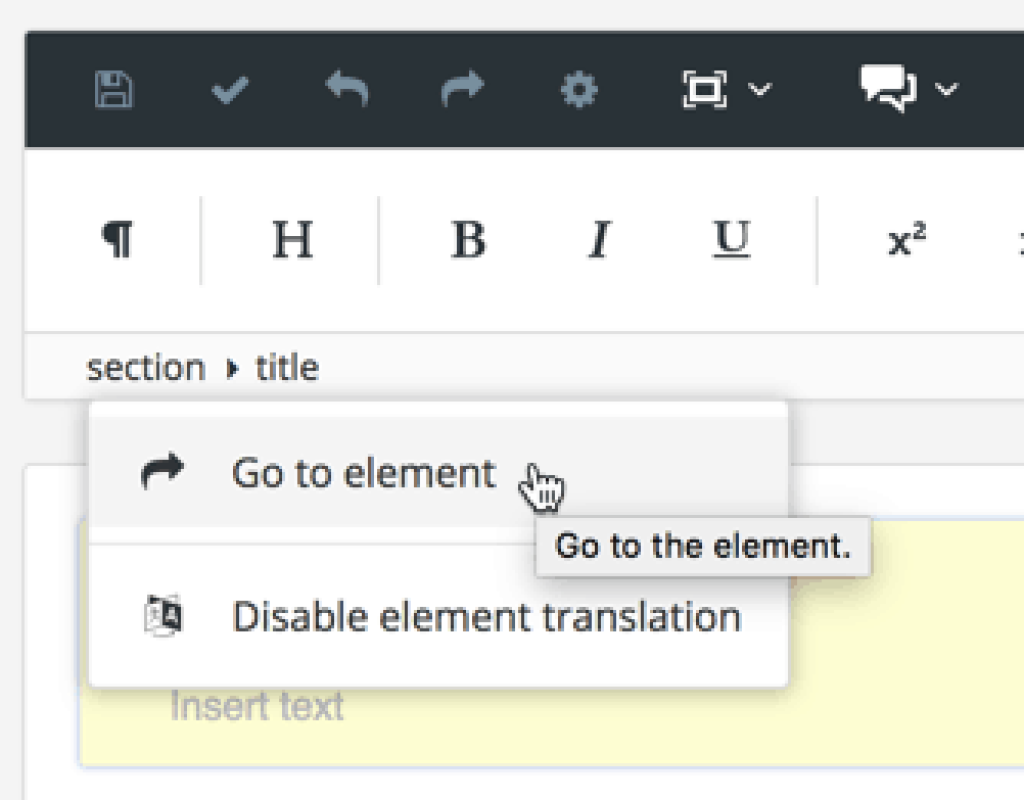
Select the section element and choose the Go to element option. This ensures that the section element is selected and that its attributes are available for use.
In the Element Attributes section, select the Role attribute.

Enter the value for the role attribute. The value can be set as the name of a class in the HTML5 output, so it makes sense to give it a name that relates to the information type. For this example, I named the role concept.

Save the topic. You now have a template topic that you can base your new 'real' concept topics on. The 'real' topics will automatically inherit the properties of the template topic, so will already have the role in place.
Repeat this procedure for each information type that you want to create. Note that if you create a task topic template, you may want to add a procedure list to it (make sure you insert a procedure and not a numbered list!).
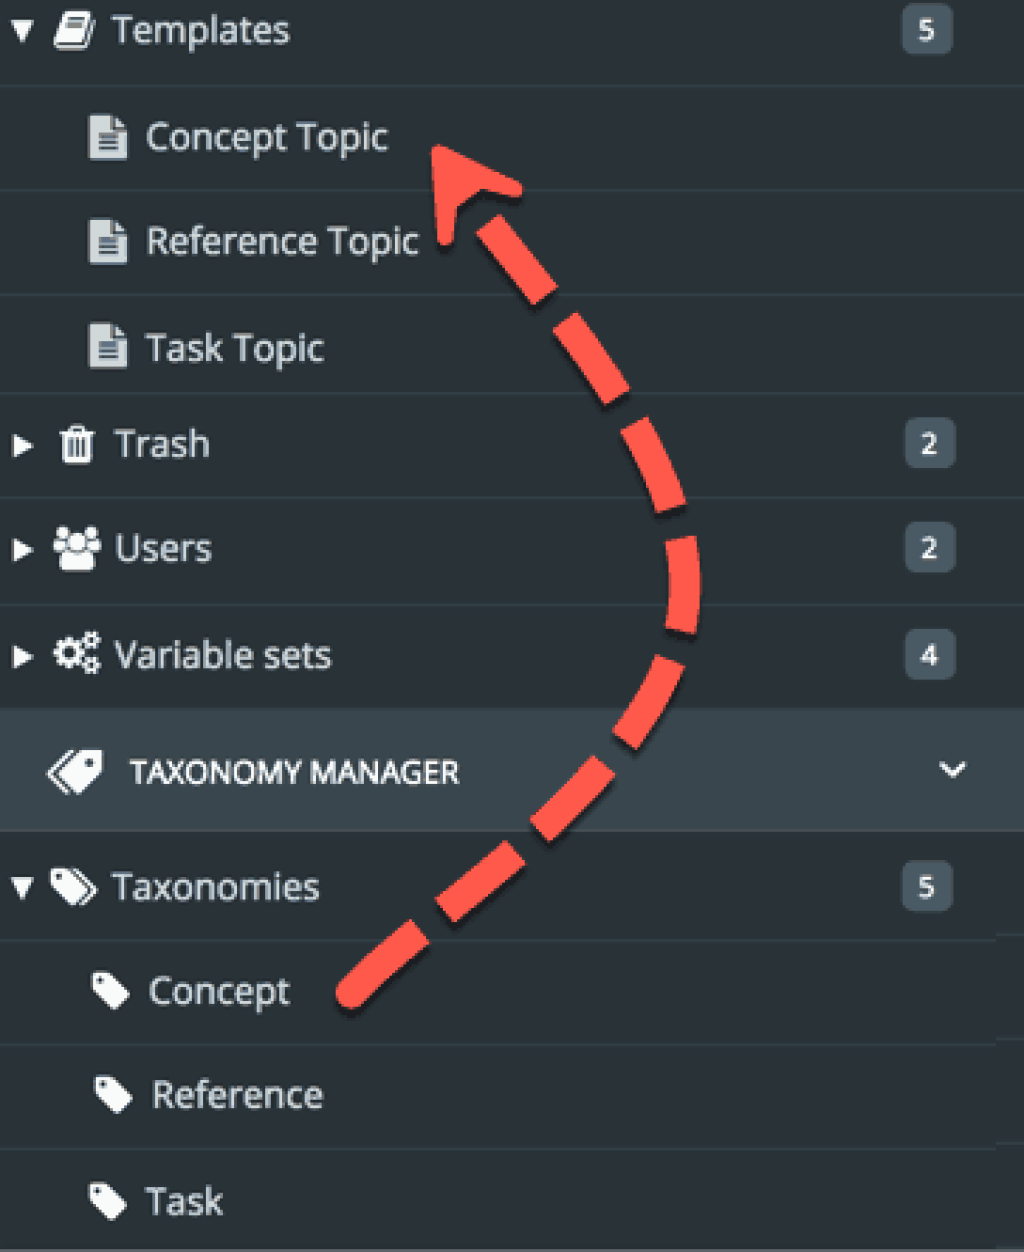
You now have templates for each information type. But you don't have any way of showing all topics of a certain type. For example, you can't show all concept topics or all task topics. We're going to change that by using taxonomies.
Create taxonomies to manage information types
Think of taxonomies as labels that you can add to your topics. They don't appear in the content, but they are there in the background as a form of metadata. You can use them to categorise your topics and they make it much easier to find your topics by type. For example, if you have an 'introduction' taxonomy tag, you can view all topics that have that tag.
With your templates, it is useful to add a taxonomy that defines the information type.
In the Taxonomy Manager, select the options button for Taxonomies.
Select Create Taxonomy Tag.
Enter the name for the taxonomy tag, for example, Concept.
Repeat the steps to create a taxonomy tag for each information type.
Drag each taxonomy tag from the Taxonomy Manager onto the appropriate topic template. For example, drag a Concept tag on to a Concept topic template.
When you drag a tag on to a template topic, the tag is associated with the topic. There's no visual indication to show that it has been associated, unfortunately (something I will mention to Paligo). But if you want to double-check, you can drag the same tag on to the same topic. If the tag is already associated with the topic, a pop-up notification appears.
When you create a topic based on a template, the topic will automatically inherit the taxonomy tag(s) that you applied to the template. You will probably want to add more topic-specific tags to the 'real' topics too.
Create topics based on topic templates
Now that you have your topic templates with taxonomies attached, you can create topics based on the templates. The topics that you create will be 'real' topics that you will add content to and will appear in the output.
To create a topic based on a topic template:
Select the options button for Documents.
Select Create Folder.
Give the folder a suitable name for your project.
Select the options button for the new folder.
Select Create Content.
On the Create Content display, select From Template.
Choose the topic template that you want to base the new topic on. For example, if you are want the topic to contain an explanation of how something works, choose your concept template.
Give the new topic a name.
Select OK.
A new topic is added to the folder. It inherits the elements from your chosen template automatically. It also inherits the taxonomy tag(s) from the template.
Whenever you need to add new topics to your project, repeat this process and choose the appropriate information type topic template each time.
Add taxonomy topics to 'real' topics
With your topic templates, you set up taxonomy tags for the information types. It makes sense, as the information types will always apply to the topic templates, no matter what the 'real' topic contains. For example, if you create a task for saving an image and a task for repairing an engine part, they are still both tasks.
But what if you want to have taxonomy tags that are more specific to the topic?
You can do that by creating a taxonomy tag and dragging it on to the 'real' topic instead of a template. And you can add as many taxonomy tags as you wish.
So using the two examples I mentioned, you might create a 'save' tag and an 'image' tag for the 'saving an image' topic. For the engine part topic, you might create tags called 'engine', 'repair, and perhaps a tag for the name of the part. The important thing is to make sure your taxonomy tags are meaningful and useful.
Authors can then view topics by their taxonomy tags. So one author might be working on repair topics and want a list of all topics with the repair taxonomy tag. Another author might be working on topics about engines and want a list of topics with the 'engine' tag.
View topics by taxonomy tag
When authoring in Paligo, you might find it useful to view a list of all topics that have a certain taxonomy tag. For example, if you're writing content about a new product that is part of a range of products, you might want to see what concepts are already written. You can then determine which existing concepts can be reused for the new product and which concepts will need to be written from scratch.
In the Taxonomy Manager, double-click on the taxonomy tag you are interested in. A list of all topics and topic templates that have that taxonomy tag appears.
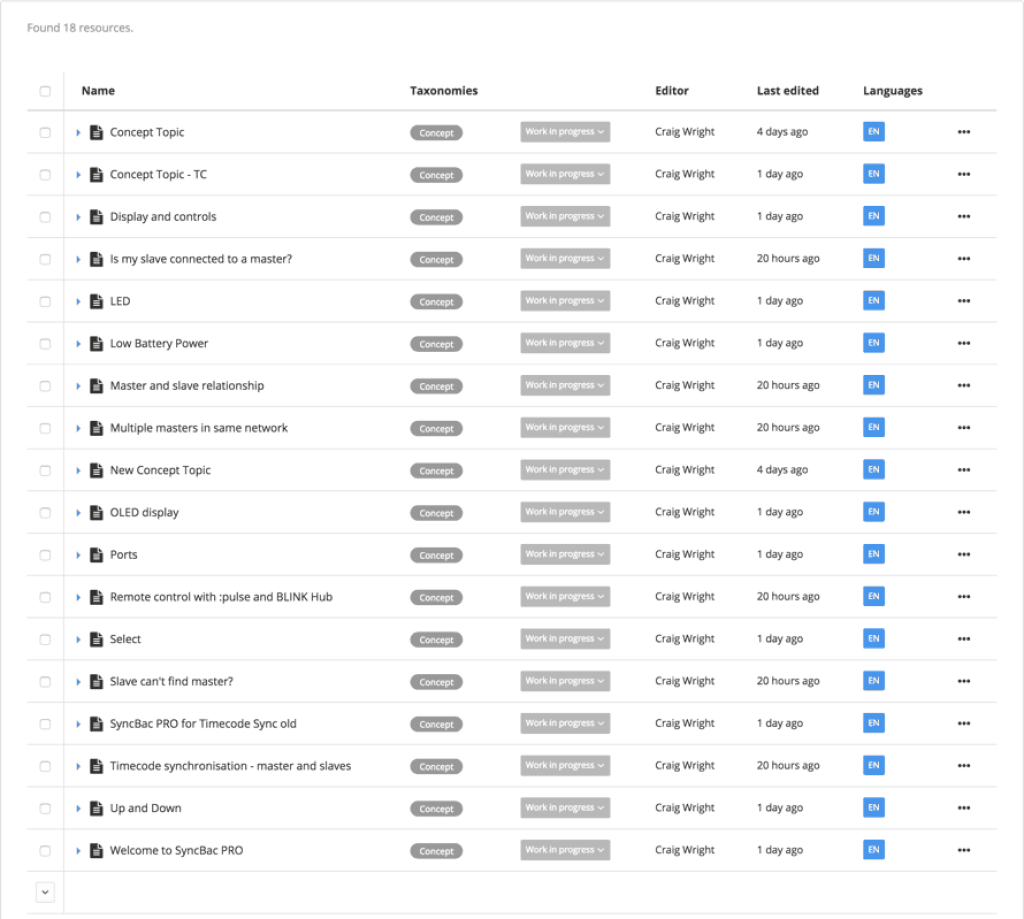
You can access any of the topics from the list and see their status, etc. You can also use the Search at the top of the list to filter the list or search for specific properties.
Style information types with CSS
In the topic template setup section, I explained how to add a role to each template. Remember that I said it was for styling the 'real' topics, if required? Well, to make that possible, you need to edit your Layout.
In the Layout Editor, select Classes and Attributes and then enable Output role attribute as class names. This will add a div class=*role name* to the HTML5 output, so that you can style it with CSS.
Note that there are several options relating to taxonomies and using them as filters on the Layout Editor. I'm not going to cover those in this post, but I'd recommend reading about them in the Paligo help. I might write another post about those some day.
Over to You
Hopefully, that's helped you understand the benefits of information typing and given you some ideas on how to set types up in Paligo. If you have any questions or comments, please let me know. I can't promise I'll know the answers, but I'll give it my best shot.
