When you create an HTML5 output in Paligo, 'See also' sections are automatically added to the bottom of topics that have children. This can be really handy, as it makes sense to link to those from the 'parent' topic. But sometimes, you may want a different set of links or no links at all. Let's see how you can take control of the see also section.
Limited options
At the time of writing this post (July 24 2018), there aren't any options in Paligo that let you control the 'see also' sections. There are plans to make changes, but it is currently a low priority item, most likely because I'm the only pain in the arse who has asked for it!
But there are a couple of things we can do with CSS and the role attribute that's available for many of Paligo's XML elements. (That role attribute sure comes in handy).
So here's what we can do:
Hide all 'see also' sections
The 'see also' section that's added to a topic is a type of table of contents. In the HTML5 output, it has the class .section-toc. So it is pretty easy to hide all of them just through CSS.
Launch an editor that is capable of creating/editing .css files. There are lots of them available on the web, such as brackets and sublime text.
If your HTML5 settings in Paligo already use a CSS file, open that file. If they are using the default CSS provided with Paligo, create a new CSS file.
Add the following code to the CSS file.
[et_pb_code custom_margin="||-20px|"].section-toc {display: none;}[/et_pb_code]Save the file and make sure it has a .css extension.
In Paligo, select Layout.
Select the layout that you will use to create your HTML5 output.
On the Layout editor, select CSS, JS, logos, and other assets.
Upload your CSS file.
Save the layout.
When you publish the HTML5 output, make sure that you choose the layout you have just edited. The HTML5 output will then contain the CSS that hides the 'see also' sections.
Hide specific 'see also' sections
If you only want to hide the 'see also' section on certain pages, there's a little bit more work involved. You need to give the 'parent' topics (those that have descendent 'child' topics) a taxonomy tag or a role attribute. You can then set Paligo to give the taxonomy or role a class in the HTML5 output, and use CSS to only hide 'see also' sections with that class.
Here, I'm going to explain how to use the role attribute, as that's what I used on my project.
Before you dive in, you need to be aware that the 'see also' section is added during the build process to the 'parent' topic.
For example, in my project, I have a 'Display and controls' topic as the parent topic and that is set to chunk (chunk means it will appear as a topic in its own right). I also have OLED, LED, Up and down, and Select topics, and these are all child topics and are set to not chunk (they will appear as sub-sections in the parent topic).
In the image, (1) is the parent topic. The 'see also' section is added to this, even if there are sub-topics (2). So it is the parent section that we need to add the Role value to.
Open the topic that Paligo will add the 'see also' section to. If there are parent and child topics, you need to open the parent topic as explained above.
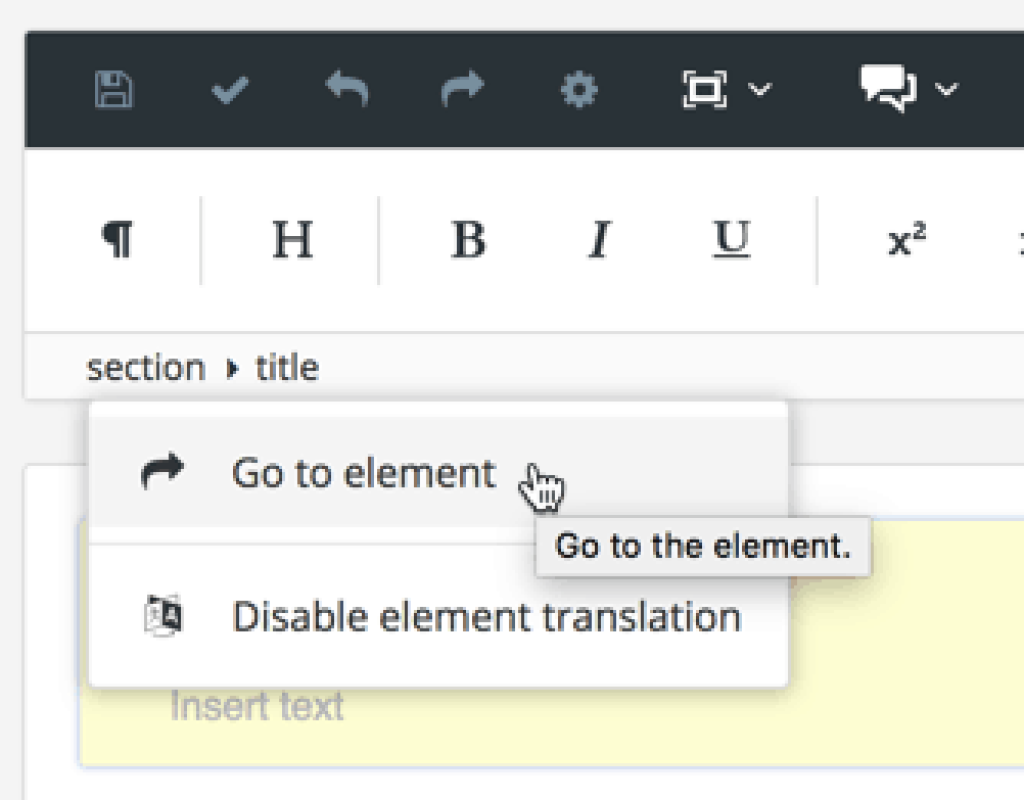
In the bar at the top, select the Section element.
Select Go to element.

In the Element attributes section, search for the Role element and add it.
In the Element attributes, select Role.
Set the value of the Role attribute.You can give the Role attribute any value, and we're going to set Paligo to output that value as a CSS class. For my project, I set the value to no-see-also. (It also has a concept role value, but that's for information typing and not needed for hiding the see also section).
Save the topic.
Launch an editor that is capable of creating/editing .css files. There are lots of them available on the web, such as brackets and sublime text.
If your HTML5 settings in Paligo already use a CSS file, open that file. If they are using the default CSS provided with Paligo, create a new CSS file.
Add the following code to the CSS file:
.no-see-also + .footer-content > .section-toc { display: none; }
Where no-see-also is the name of the value you assigned to the Role attribute.
Save your CSS file and make sure it is saved with a .css extension.
In Paligo, select Layout.
Select the layout that you will use to create your HTML5 output.
On the Layout editor, select CSS, JS, logos, and other assets.
Upload your CSS file.
On the Layout editor, select Classes and attributes.
Set Output 'role' attribute as class names to enable.
Save the layout.
When you publish your content, Paligo will add the 'see also' section. But when you display the output in a browser, the browser will use the CSS to hide the 'see also' section from view.
Remember to repeat this process for each topic that has a 'see also' section that you want to hide.


